


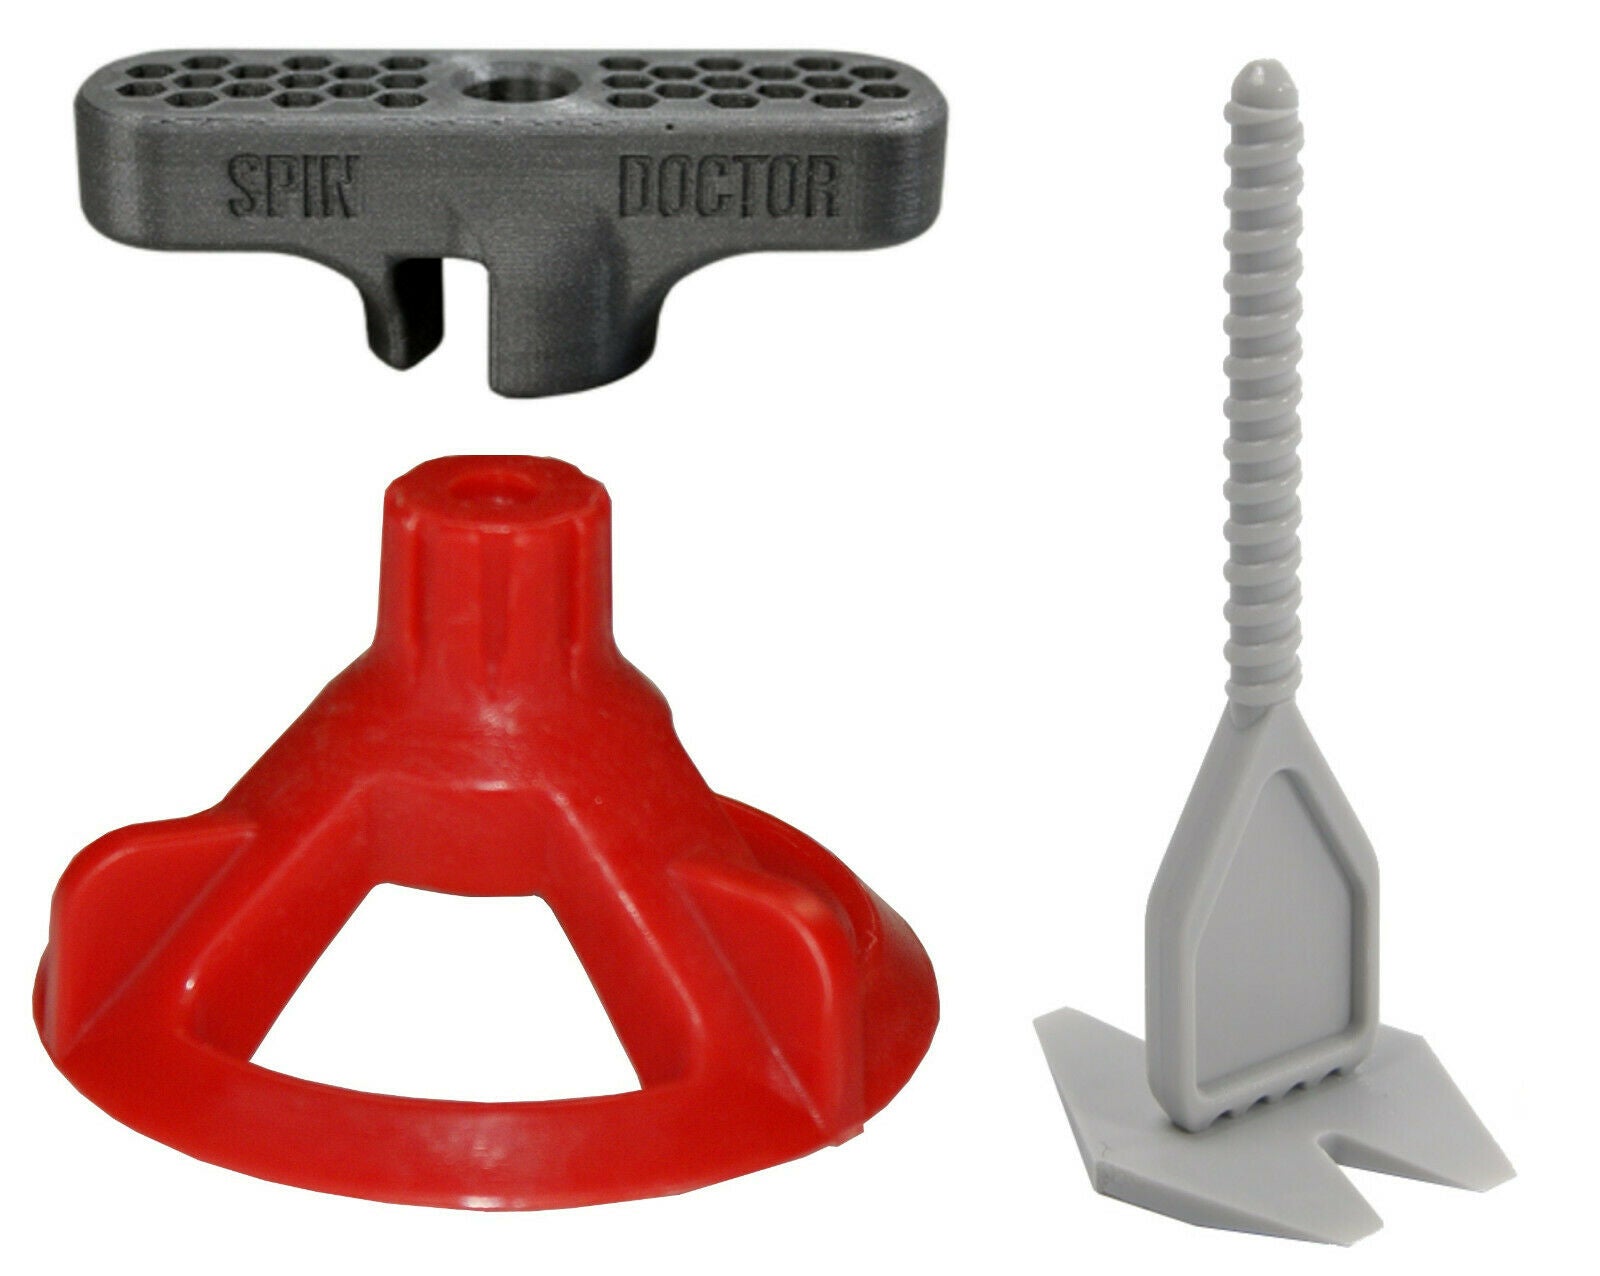


Spin Doctor Tile Leveling System BASIC 250 KIT with Anti Fatigue Tool
Spin Doctor Lippage Control System 250 Kit with NEW Torque Monster Anti-Fatigue Tool
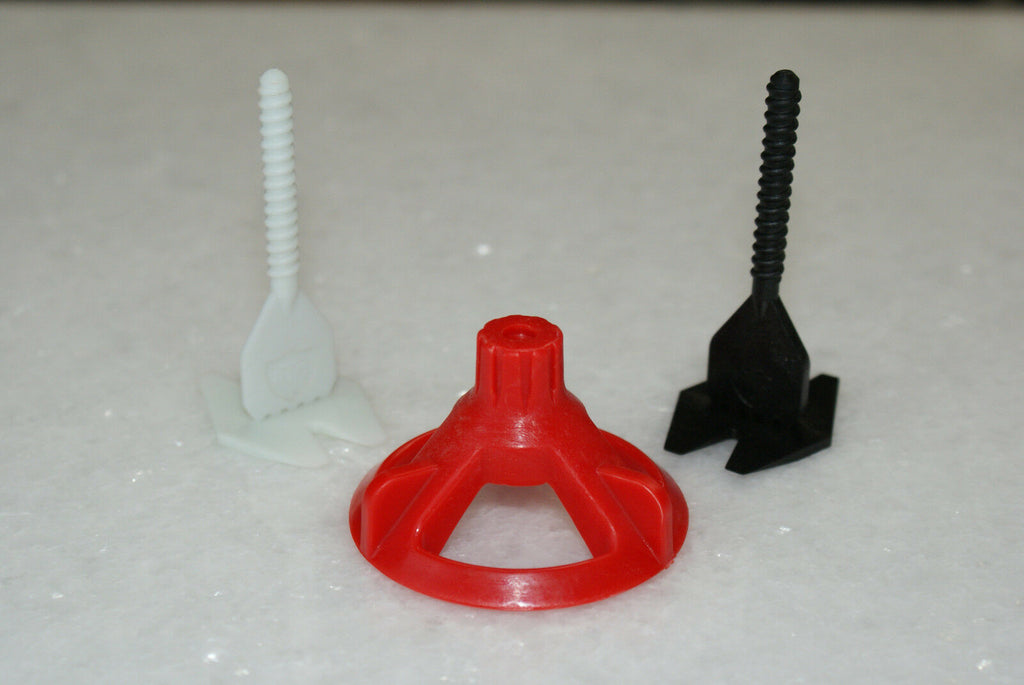
Kit includes: 100 Caps (reusable), 250 Base plates Plus Torque Monster Anti-Fatigue Tool (Eliminate hand fatigue, Just grip it and twist!). Choose base plates posts: 1/16" White, 1/8" Black, 3/16" Grey, 1/32" Red.
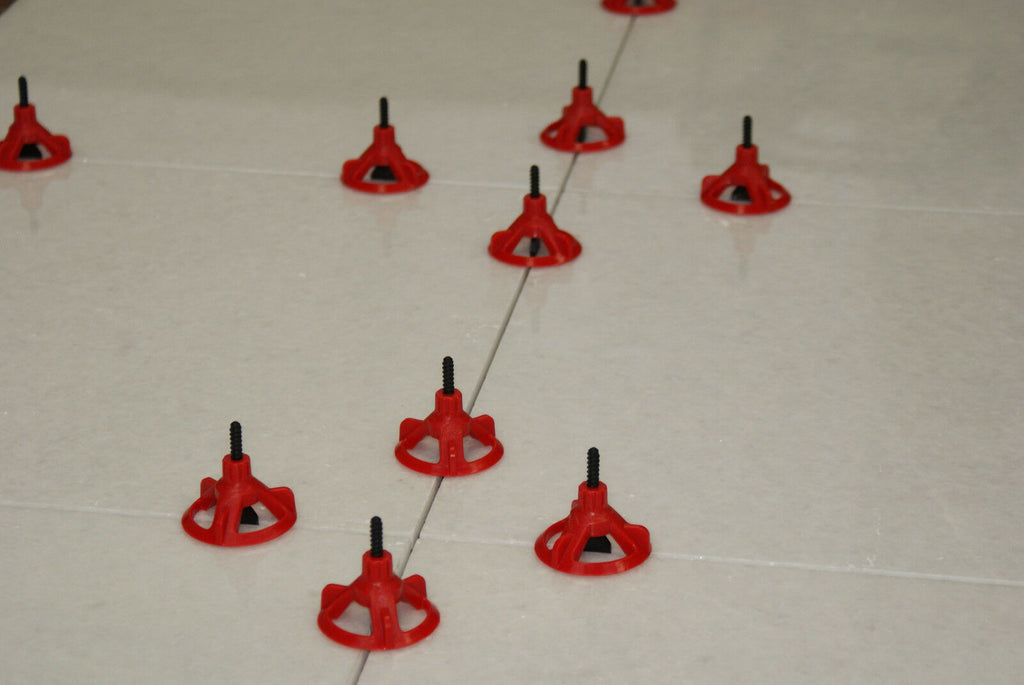
- Prevents uneven tiles when laying floors, especially large format tile.
- Spaces, levels, and aligns all in one package.
- No additional installation tool required.
- Simply kick away to remove after installation.
- Works for floors and walls
- Caps reusable for multiple jobs.
The Spin Doctor System uses a fast and precise free spin action that will accommodate most tile surfaces or thickness. Achieving a flush surface from one tile to another has never been easier. With the new Spin Doctor Lippage Control System you can spin the leveling cap down to the tile surface in seconds. Other systems require tools, use of both hands, or awkward repetitive motions. This can cause user fatigue when installing large format tile.
Easy Step by Step Installation Instructions
1. Insert the threaded spacer posts beneath each exposed edge of the tile, making sure there is direct contact between the spacer and the tile with no mortar in between. Position the spacer posts to best suit the tile size and layout.
2. Install the adjacent tile against the already inserted threaded spacer posts. Slide the tile back and forth or use a rubber mallet to bed the tile into the mortar while releasing air trapped below.
3. Place the rotating cap on the top of the threaded spacer post and easily spin the cap down to the tile surface in seconds. Tighten cap as needed until all adjacent surfaces are flush.
4. After mortar is cured to the manufacturer specification, the caps, threaded spacer posts, and Anti-Friction Shields can be removed by kicking the pieces or using a rubber mallet in the same direction as the grout joint.